polytripper
setting up your schedule

You decide when you want to teach. You can set up a schedule, so students will know when they can book lessons with you. You can do so by going to the Schedule tab in Teacher Settings. There you will see three tabs: Default Availability, Not Available and Combined Schedule. Below we will explain you how these three tabs work.

Default Availability

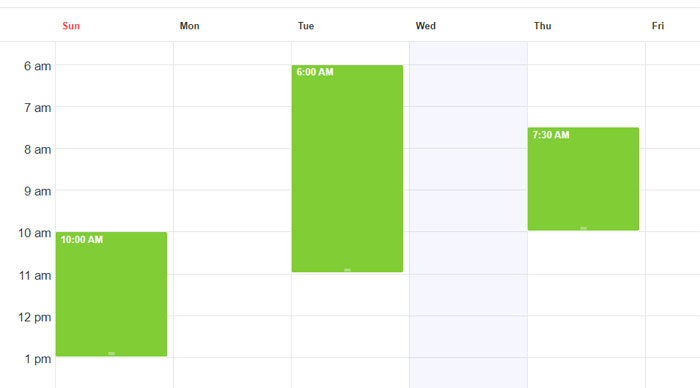
You can use this tab to set up the times when you are almost always available. For instance, if you know that you are able to teach pretty much every Sunday from 10 in the morning until 1 in the afternoon, every Tuesday from 6 until 11 in the morning and every Thursday from 7:30 until 9 in the morning, then you can mark that in the default availability schedule like this:


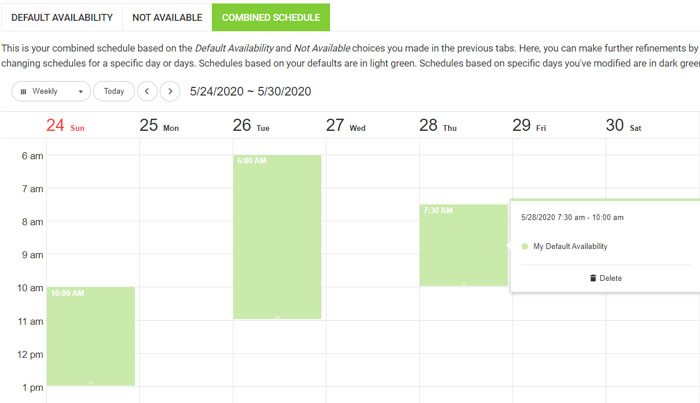
You'll have to enter the exceptions to the default schedule manually in the Combined Schedule tab. See step 3.

Not Available

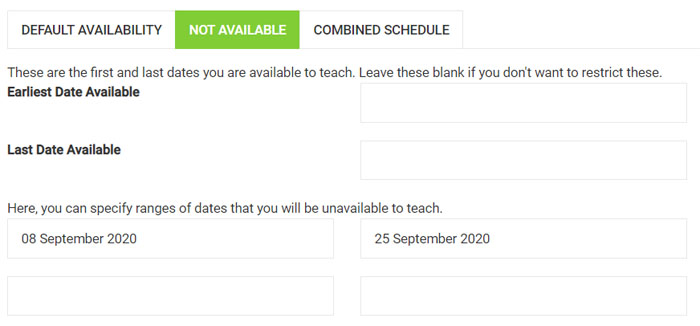
This tab can be used to provide the earliest and last dates that you will be teaching. You can also leave them blank. You can also mark ranges of dates where you won't be available to teach. For instance, if you will be going on vacation from September 8th until September 25th, then you can fill that in as follows:


Combined Schedule

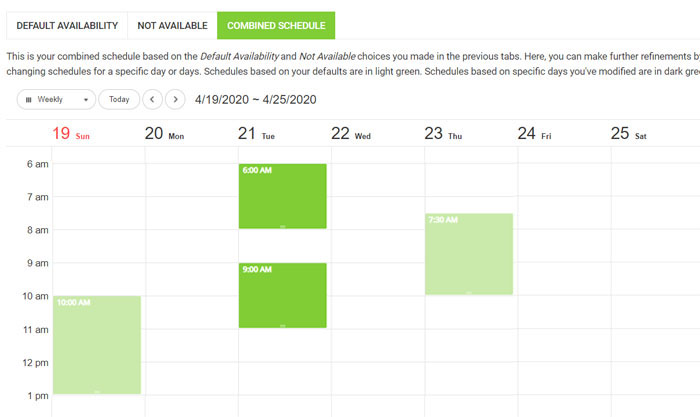
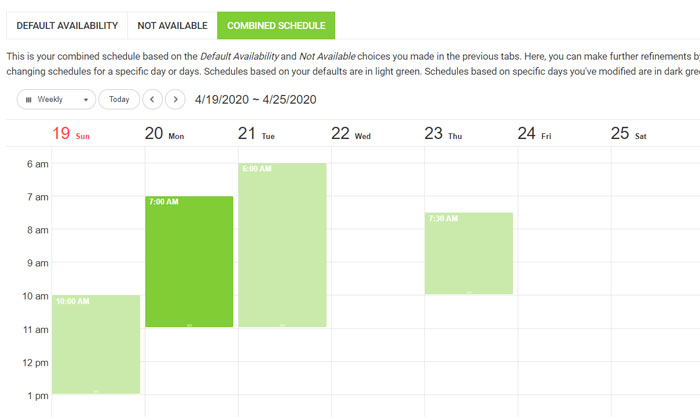
The combined schedule is a combination of everything.

  • It will show you the default days you're available as chosen in Default Availability.
  • It will mark all the days from Unavailable as unavailable.
  • It will mark the times students have booked lessons in PolyTripper as unavailable.
  • It will mark all the events from your external calendars as unavailable. You can read more about external calendars at this link.

You can use this tab to fine-tune your schedule. We'll show you some examples.

Remove a Day
If for instance you aren't available to teach on May 28th, then you can click on the availability of that day and then click on delete. See the following image:


Remove Time From a Day
If you are unavailable from 8:00AM to 9:00AM, because you have a dentist appointment for instance, you can remove this time in two steps. First, you need to remove the entire block this hour is a part of (see above under Remove a Day), then you need to put the hours back where you are available to teach. The result will look like the image below.


Add Time to a Day
You can also manually add availability to any particular day. If for instance you are available to teach on the 20th of May from 7 until 11 in the morning, then you can add that to your calendar as shown in the image below. This day will be marked in a darker green than the default availability.


If your schedule is completely crazy and changes from week to week, you can also not fill in anything in the Default Availability tab and manually add your availability to the Combined Schedule tab.

Regardless of how you decide to manage your schedule, you're in charge, but you are also responsible for maintaining your schedule. Students do not like it if you reject their lesson requests because you are not available, even though your calendar says you are. Try to always keep it up to date! Of course we understand it that last minute emergencies can occur. In that case, please apologize to your student.

If you never know when you are free to teach, you can also leave your entire schedule blank and only teach instant lessons. You can read more about instant lessons at this link. In that case you will only show up on the teacher search page when you have your instant lessons turned on.